Posts

Showing posts from December, 2020

Mathematical Equation Insertion in MS-Word

Image
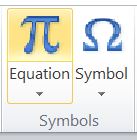
Mathematical Equation Insertion in MS-Word It is very easy to insert Mathematical Equation in MS-Word. For this we have to Click on Insert Menu. Under which we get the option of Equation which looks as given below: When we click on it, there come few examples as given below: If we want to Insert a new equation which is not available in the example, than we have to click on Insert New Equation. When we click on  Insert New Equation. A new Toolbar appears on screen by whose help we can insert different symbols and structures to insert our Equation properly. It provides us symbols of different types. which can be seen under symbols toolbar. They are as given below. And other option which is available is Structures, by which we can input different type of structures such as Fraction, Script, Radical, etc. All are as given below: These equations can be prepared here and can be copied to any other software. In software like Coreldraw, Page Maker, etc. we get the option of insert object in wh

Screenshot Tool in MS-Office

Image
 Screenshot Tool in MS-Office MS-Office gives us many tools. One of its tool is Screenshot, which helps us to take a snap/image of the screen and place it in our document directly. For instance one wants to add an image which a person is not able to download form internet. One can simply use Snipping tool available in windows or Screenshot available in Software of MS-Office.  Screenshot is available in Insert Menu of Word, Excel, PowerPoint. When you click on Screenshot in Insert menu. It shows you Available Windows as the option in which it shows all the windows which are currently open. They image is not very appropriate when taken from Available Windows Option. Also sometimes it is not able to show all the open windows.  Screenshot added through Available Windows Option Other than Available Windows another option available is Screen Clipping. For which one has to keep the window open of which the Screenshot is to be taken.  We know that Alt+Tab is used to switch between two windows.

SAVING A WORD FILE TO PDF

Image
SAVING A WORD FILE TO PDF It is very easy task, though many of us don't know about how to save a MS-Word File in PDF format.  First of all enter data as per your requirement in MS-Word. The only thing is to do when you want to save file in PDF format you have to press Save As (F12) instead of Save (Ctrl + S). In the Save As dialogue box in Save as Type select PDF and press enter. Your file will be saved in PDF Format.  In above image you can see Save As dialogue box in which Save as type has been set open. It contains PDF in it which is shown below. One has to choose only this while saving the file into PDF format.  Remember this option is only available in MS-Office version 2010 and above.  Hope the information in this blog is useful. Please do leave a comment/query for this blog. इस  प्रकार की कम्प्यूटर सम्बंधित जानकारी के लिए हमारी वेबसाइट पर ब्लॉग लिंक पर क्लिक करें।  द्वारा  कुमार वैभव  डायरेक्टर  वैभव कंप्यूटर सेंटर एवं कंसल्टेंसी  वैभव सदन, देवकाली रोड,  फैज़ाबाद, अयोध्या।  C

FORMAT PAINTER IN MS-WORD

Image
 FORMAT PAINTER IN MS-WORD We know Ctrl + C is used to Copy a text/ matter to clipboard or computer memory and than it could be pasted to any other place in the document. Here we will learn the work of Format Painter in MS-Word. It is used to copy the formatting of a selected text or matter which can be later on implied on the other selected text. Shortcut key to copy formatting of a text/matter is Ctrl + Shift + C, and for applying the formatting is Ctrl + Shift + V. First of all select the text of which formatting is to be copied. Than press Ctrl + Shift + C to copy its formatting to clipboard.  Secondly select the text on which the formatting is to be applied. Than press Ctrl + Shift + V to apply formatting to the selected text.  The other way is to select the text and click on format painter tool in home to copy the formatting to the clipboard. and than click on the text of which formatting you want to change.  This tool is very much useful at times when you don't want to remem

Making Labels through Mail Merge in MS-Word

Image
 Making Labels through Mail Merge in  MS-Word We all have to send letters to some or the other or have to send Diwali Greetings, Card, etc. in bulk numbers. I have already posted a blog on simple mail merge.  https://computerlessonsbyvcc.blogspot.com/2020/10/mail-merge-in-word.html Also YouTube video:  YOUTUBE LINK:  https://youtu.be/YDFJ9Kce0e0   But now in this blog we will learn about making labels through mail merge. There are different type of gumming sheets for labels available in market. On which we can directly print labels and paste them as per our requirement.  First thing is to make a file with data in table format. Usually a labels contains: Name, Address, City, Pin Code, State, Mobile Number. etc. In Second step we have to create a file in which this data is to be merged. Here the main work is to set the table in the format of a label.  For this simply count the number of labels in rows and columns on your paper and make the table of that number of rows and columns in Word

MAIL MERGE IN COREL DRAW

Image
MAIL MERGE IN COREL DRAW Those who have worked in MS-Word should be knowing about Mail Merge. In mail merge we need two documents, one having list and other in which a common matter in which the data from the list gets merged to form a new document.  Today in this blog you will learn about merging in Corel Draw. Suppose in case you have made a Certificate and you want to print different names on it or  a letter of depositing fees. Than first of all you have to create a list. To create a list you can use Excel. Type down the list in Excel and save it in .csv file format .  To save in .csv choose save as type to CSV Once you are done you can right click on the Standard Tool Bar to open Print Merge Tool Bar in Corel Draw.  Than type down the letter which you have to send to all. Once your letter or matter is set.  Click on Create/ Load in Print Merge Tool Bar. A menu will appear, where we have to choose, " Import text from a file or an ODBC data source ".  After clicking next